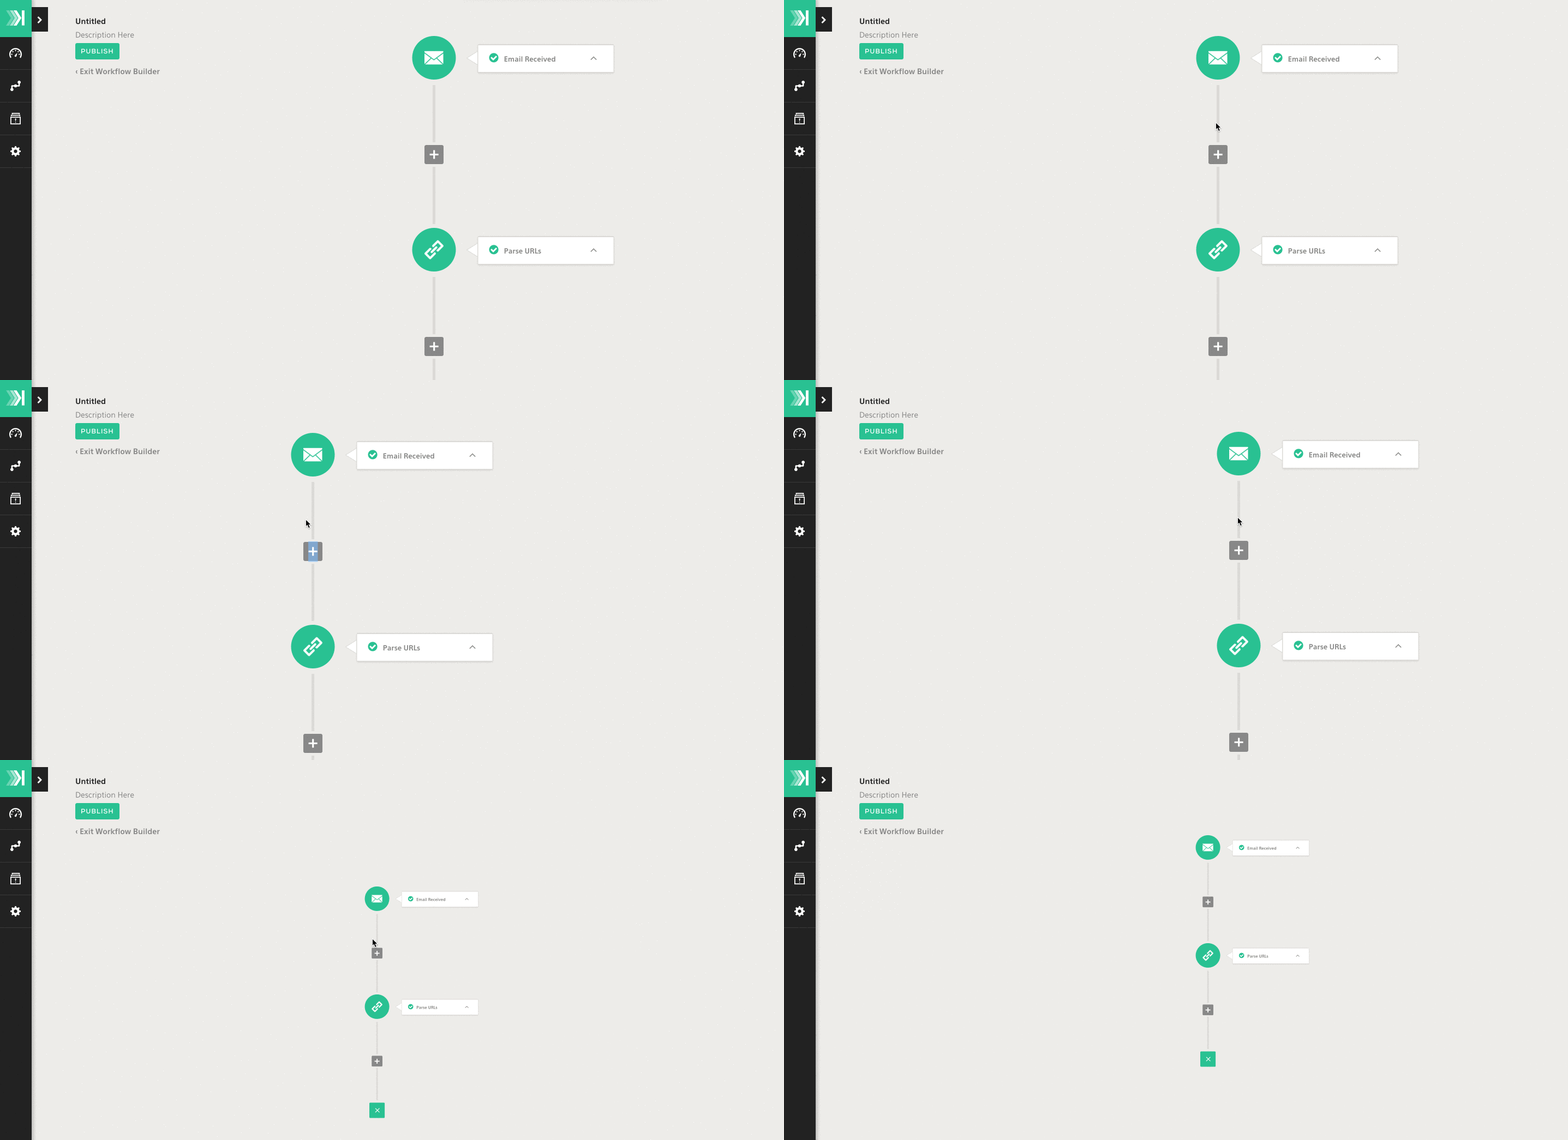
Here at Komand, we needed a way to easily navigate around our workflows. They have the potential to get complex quickly, as security workflows involve many intricate steps.

To accomplish this task, we took an SVG approach to render our workflow dynamically (without dealing with div positioning issues). This gave us the power of traditional graphics to do a variety of manipulations on sub components.
In this walkthrough, we will use Interactive SVG Components as a starting point and incorporate those techniques into a React component. I highly recommend reading this article if you need an update on some basic graphics concepts or would like to see an explanation of the math.
Let's begin!
First, we start by initializing our matrix using an identity matrix, from which we will do all our transformations.
import React from 'react';
import autobind from 'autobind-decorator'

@autobind
class SvgMap extends React.Component {
  constructor(props) {
    super(props);
    this.state = {
      matrix: [1, 0, 0, 1, 0, 0],
      dragging: false, // useful later in the blog
    };
  }

  render() {
    const { width, height } = this.props;
    return (
      <svg width={width} height={height}>
        <g transform={`matrix(${this.state.matrix.join(' ')})`}>
          {this.props.children}
        </g>
      </svg>
    );
  }
}

SvgMap.propTypes = {
  children: React.PropTypes.any,
  width: React.PropTypes.number.isRequired,
  height: React.PropTypes.number.isRequired,
};

export default SvgMap;
Note: this.state.matrix.join(' ') creates a string of our matrix for the transform property. (e.g. "1 0 0 1 0 0" )
We need to be able to move around our map in all directions, which requires us to construct a pan function. We want to be able to reuse this function, so we keep its scope limited. We take a delta of x (dx) and delta of y (dy) and add them to the 4th and 5th elements of our matrix, which control those transformations.
pan(dx, dy) {
  const m = this.state.matrix;
  m[4] += dx;
  m[5] += dy;
  this.setState({ matrix: m });
}
Next, we implement zoom. We need to scale each item in our matrix by the scale given as a parameter. (e.g. 1.05 will zoom in while 0.95 will zoom out)
zoom(scale) {
  const m = this.state.matrix;
  const len = m.length;
  for (let i = 0; i < len; i++) {
    m[i] *= scale;
  }
  m[4] += (1 - scale) * this.props.width / 2;
  m[5] += (1 - scale) * this.props.height / 2;
  this.setState({ matrix: m });
}
Now, if we want to be able to drag ourselves around the map as we do with any other map application, we need to utilize mouse events. We add these to our svg element, as any movement in here should cause us to update our state. We also add Touch events, so we can be touch screen friendly :)
render() {
  return (
    <svg
      onMouseDown={this.onDragStart}
      onTouchStart={this.onDragStart}
      onMouseMove={this.onDragMove}
      onTouchMove={this.onDragMove}
      onMouseUp={this.onDragEnd}
      onTouchEnd={this.onDragEnd}
    >
      <g transform={`matrix(${this.state.matrix.join(' ')})`}>
        {this.props.children}
      </g>
    </svg>
  );
}
If you want to have fun with the zoom functionality, hook up the onWheel event to a custom method where you zoom based on the direction of the onWheel event. It should look something like below:
  onWheel(e) {
    if (e.deltaY < 0) {
      this.zoom(1.05);
    } else {
      this.zoom(0.95);
    }
  }
Next we need to implement the onDragStart, onDragMove, and onDragEnd methods.
First up, we have the onDragStart function. All we need to do here is find the coordinates of the onMouseDown event to get our starting position and update the dragging state to true.
onDragStart(e) {
  // Find start position of drag based on touch/mouse coordinates.
  const startX = typeof e.clientX === 'undefined' ? e.changedTouches[0].clientX : e.clientX;
  const startY = typeof e.clientY === 'undefined' ? e.changedTouches[0].clientY : e.clientY;

  // Update state with above coordinates, and set dragging to true.
  const state = {
    dragging: true,
    startX,
    startY,
  };

  this.setState(state);
}
The function onDragMove will utilize our pan function that we created earlier. We check if the state is dragging, get the new x and y coordinates, compute the deltas, and pan using the function we created earlier.
onDragMove() {
  // First check if the state is dragging, if not we can just return
  // so we do not move unless the user wants to move
  if (!this.state.dragging) {
    return;
  }

  // Get the new x and y coordinates
  const x = typeof e.clientX === 'undefined' ? e.changedTouches[0].clientX : e.clientX;
  const y = typeof e.clientY === 'undefined' ? e.changedTouches[0].clientY : e.clientY;

  // Take the delta where we are minus where we came from.
  const dx = x - this.state.startX;
  const dy = y - this.state.startY;

  // Pan using the deltas
  this.pan(dx, dy);

  // Update the new startX and startY position
  // because a drag is likely a continuous movement
  this.setState({
    startX: x,
    startY: y,
  });
}
On drag end is then simple, as we only need to update the state to no longer be dragging.
onDragEnd() {
  this.setState({ dragging: false });
}
Using this functionality, we can create a component that assists with navigation (using buttons or keyboard shortcuts). This component will probably live within our SvgMap component, so how will we get this functionality to them? As props!
While we could use React.cloneElement to give this functionality to all the children, I like using a higher order component here to let the user decide with a subcomponent who gets what functionality.
Let's take our SvgMap component and wrap it in a function (I've cut out all methods except the render and constructor for readability):
import React from 'react';
import autobind from 'autobind-decorator';

export default (ComposedComponent) => {
  @autobind
  class SvgMap extends React.Component {
    constructor(props) {
      super(props);
      this.state = {
        matrix: [1, 0, 0, 1, 0, 0],
        dragging: false,
      };
    }

    render() {
      const { height, width } = this.props;
      return (
        <svg>
          <g transform={`matrix(${this.state.matrix.join(' ')})`}>
            <ComposedComponent
              pan={this.pan}
              zoom={this.zoom}
            ></ComposedComponent>
          </g>
        </svg>
      );
    }
  }

  SvgMap.propTypes = {
    width: React.PropTypes.number.isRequired,
    height: React.PropTypes.number.isRequired,
  };

  return SvgMap;
};
You can see we now take a ComposedComponent as an argument and use it as a child of our SvgMap component, so that we can add props to be passed down.
To use this component it's as simple as importing the function and calling it with your component as a parameter. Let’s render a circle and a square in MyMap:
import React from 'react';
import autobind from 'autobind-decorator';
import SvgMap from './SvgMap';

@autobind
class MyMap extends React.Component {
  render() {
    return (
      <g>
        <circle r="50" fill="teal" stroke="black"></circle>
        <rect   fill="black" stroke="teal"></rect>
      </g>
    );
  }
}
export default SvgMap(MyMap);
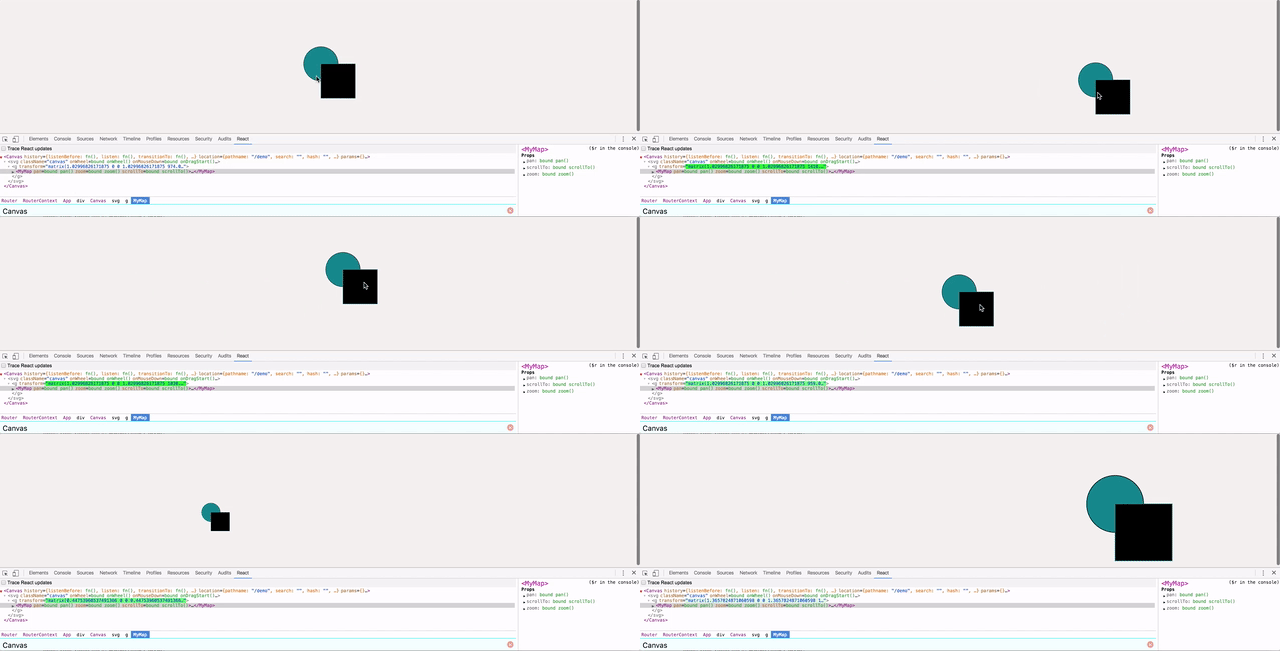
Using React Devtools, we can view the component, and all the functions we now have available on MyMap as props:

I’ve hooked up the zoom to keyboard shortcuts to + and -, but you could easily add zoom in and zoom out buttons that when clicked call zoom with the proper scale. Here is a small demo showing the functionality:

For reference, I’ve included the entire SvgMap component below:
import React from 'react';
import autobind from 'autobind-decorator'

@autobind
class SvgMap extends React.Component {
  constructor(props) {
    super(props);
    this.state = {
      matrix: [1, 0, 0, 1, 0, 0],
      dragging: false,
    };
  }

  onDragStart(e) {
    // Find start position of drag based on touch/mouse coordinates.
    const startX = typeof e.clientX === 'undefined' ? e.changedTouches[0].clientX : e.clientX;
    const startY = typeof e.clientY === 'undefined' ? e.changedTouches[0].clientY : e.clientY;

    // Update state with above coordinates, and set dragging to true.
    const state = {
      dragging: true,
      startX,
      startY,
    };

    this.setState(state);
  }

  onDragMove(e) {
    // First check if the state is dragging, if not we can just return
    // so we do not move unless the user wants to move
    if (!this.state.dragging) {
      return;
    }

    // Get the new x coordinates
    const x = typeof e.clientX === 'undefined' ? e.changedTouches[0].clientX : e.clientX;
    const y = typeof e.clientY === 'undefined' ? e.changedTouches[0].clientY : e.clientY;

    // Take the delta where we are minus where we came from.
    const dx = x - this.state.startX;
    const dy = y - this.state.startY;

    // Pan using the deltas
    this.pan(dx, dy);

    // Update the state
    this.setState({
      startX: x,
      startY: y,
    });
  }

  onDragEnd() {
    this.setState({ dragging: false });
  }

  onWheel(e) {
    if (e.deltaY < 0) {
      this.zoom(1.05);
    } else {
      this.zoom(0.95);
    }
  }

  pan(dx, dy) {
    const m = this.state.matrix;
    m[4] += dx;
    m[5] += dy;
    this.setState({ matrix: m });
  }

  zoom(scale) {
    const m = this.state.matrix;
    const len = m.length;
    for (let i = 0; i < len; i++) {
      m[i] *= scale;
    }
    m[4] += (1 - scale) * this.props.width / 2;
    m[5] += (1 - scale) * this.props.height / 2;
    this.setState({ matrix: m });
  }

  render() {
    const { height, width, ...other} = this.props;
    return (
      <svg
        height={height}
        width={width}
        onMouseDown={this.onDragStart}
        onTouchStart={this.onDragStart}
        onMouseMove={this.onDragMove}
        onTouchMove={this.onDragMove}
        onMouseUp={this.onDragEnd}
        onTouchEnd={this.onDragEnd}
        onWheel={this.onWheel}>
        <g transform={`matrix(${this.state.matrix.join(' ')})`}>
          <ComposedComponent
            {...other}
            pan={this.pan}
            zoom={this.zoom}
          ></ComposedComponent>
        </g>
      </svg>
    );
  }
}

SvgMap.propTypes = {
  width: React.PropTypes.number.isRequired,
  height: React.PropTypes.number.isRequired,
};

export default SvgMap;
I hope you enjoyed our journey through creating a map component using SVG and React. Now go make yourself a minimap!
