Purpose
Organizations with mature security programs often test their own internal awareness programs by performing social engineering campaigns (e.g., telephone pretexting) on their personnel. These may include hiring third-party consulting companies as well as performing internal tests. These tests should strive to be as real-world as possible in order to accurately simulate a malicious actor and learn from employees’ reactions and ascertain the level of risk they pose to the organization.
Spoofing telephone numbers is a real-world tactic used by malicious actors as part of phishing campaigns, so it's a helpful capability for internal security teams to have in their arsenals as they defend their organizations against this common threat. In this post, we'll explain how security professionals can build a caller ID spoofer for purposes of simulating attacks and building internal awareness.
Download Rapid7's Annual Vulnerability Intelligence Report ▶︎
My Introduction to Asterisk
Early in my penetration testing career, I was tasked with performing a wardialing modem hacking gig—the client wanted to test their telephone network for modem-related weaknesses. This was a challenge because not only did I not know anything about modem hacking, but I didn’t know anything about the wide world of telephony.
Fortunately, I had about two weeks to figure it out before the job started. So I set to work learning about modem hacking, telephony, and a lot about Asterisk. Most importantly, I learned how to spoof your caller ID when wardialing—which can be used for a lot more than just prank calling your buddies.
There are services that can automate this process for you—some even have mobile apps that have other features, such as call recording and voice changing. However, these services can cost upwards of 25 cents per call, which simply isn’t sustainable when we make thousands of calls per year.
When we did the wardialing job with our home-grown spoofer, the bill from our SIP service provider was less than $10 for over 2,000 calls. That’s more like it! Additionally, for calls that answered, each averaged 53 seconds in order for Warvox to record and fingerprint devices, such as modems, faxes, or angry security guards.
I’m certainly not a PBX or telephony expert, nor do I have a background managing Asterisk, but I am good at hammering on stuff until it seems to work. Hopefully this will help folks in the industry to overcome some of the challenges I’ve faced.
So here’s how you can build your own caller ID spoofer.
- SIP (Session Initiation Protocol) –The de facto standard for VoIP communication, used for initial authentication and negotiations when making connections.
- RTP (Real-Time Transport Protocol) – Chatty, used to transmit audio after authentication and negotiations.
- IAX (Inter-Asterisk Exchange) – Legacy, less chatty, must have trunk to convert from IAX to SIP service provider.
- DISA (Direct Inward System Access) – This is sort of like VPN’ing to your internal system, so you can dial internal extensions.
- DID (Direct Inward Dialing) – This is the telephone number assigned by your service provider. Analogous to an external IP address, but for telephony.
Setting up Asterisk
You need to setup your Asterisk server to where it can be accessible—ideally an external IP. However, internally NAT’ed will work if you plan on VPN’ing in and using a softphone or using port forwarding. FreePBX is available as an AWS AMI image, so that’s the route that I took. The specifications can be run in the free tier and Elastic computing will run you approximately $10 a month depending on utilization of the PBX and, if you’re like me, leave it powered on all the time.
Once you have your FreePBX VM up and running here’s what you want to do:
Open:
- SIP TCP/UDP 5060 to Service Provider (discussed in next step)
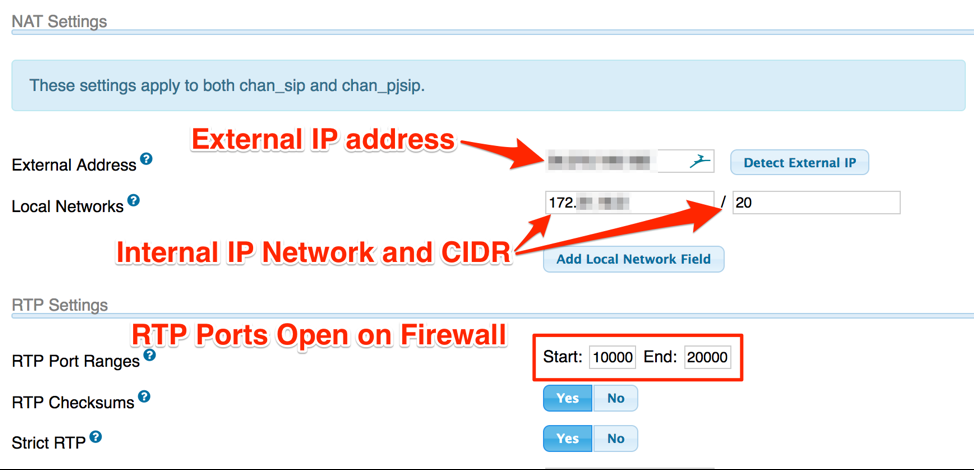
- RTP UDP 10000-20000 to your public IP address
Settings → Asterisk SIP Settings

- Ensure external Address and Local Networks are accurate
- Ensure ulaw, alaw, gsm, g726 codec checkboxes are ticked

Choosing a Provider and Setting up a Trunk
There are many providers out there. When choosing one, I’d say go off the quality of their website. If they have a portal where you can create requests for trunks, DIDs, specify your IP for their firewalling, etc., that’s a bonus. I went with my provider because they supported me with IAX when I was doing wardialing and seemed to have good customer service.
Once you’ve chosen your provider, you’ll need to setup your SIP trunk in Asterisk:
- Connectivity → Trunks → Add Trunk
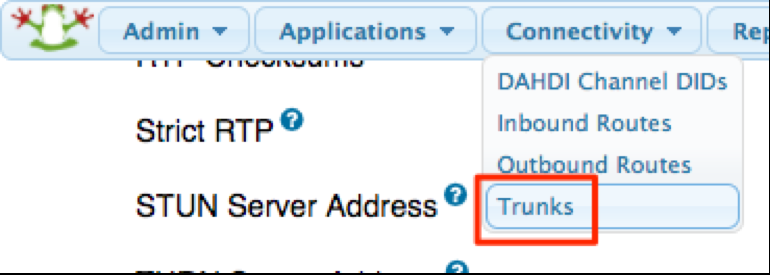
- Click Add SIP (chan_sip) Trunk
- Set your Trunk Name
- Set Dialed number manipulation rules
- 1 + NXXNXXXXXX
- 1NXXNXXXXXX
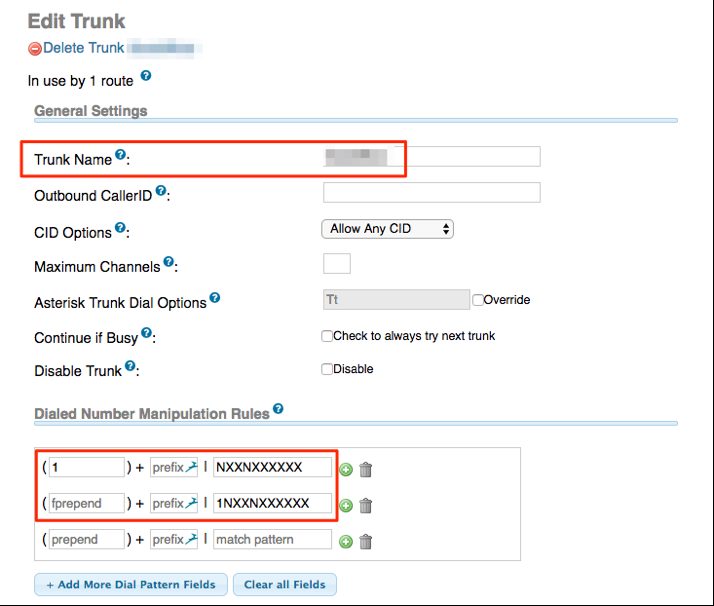
- Set your trunk name
- Set up peer details
- Set User Context and User Details
- ‘Host’ and ‘FromDomain’ is provided by the service provider, often under the support section of their website
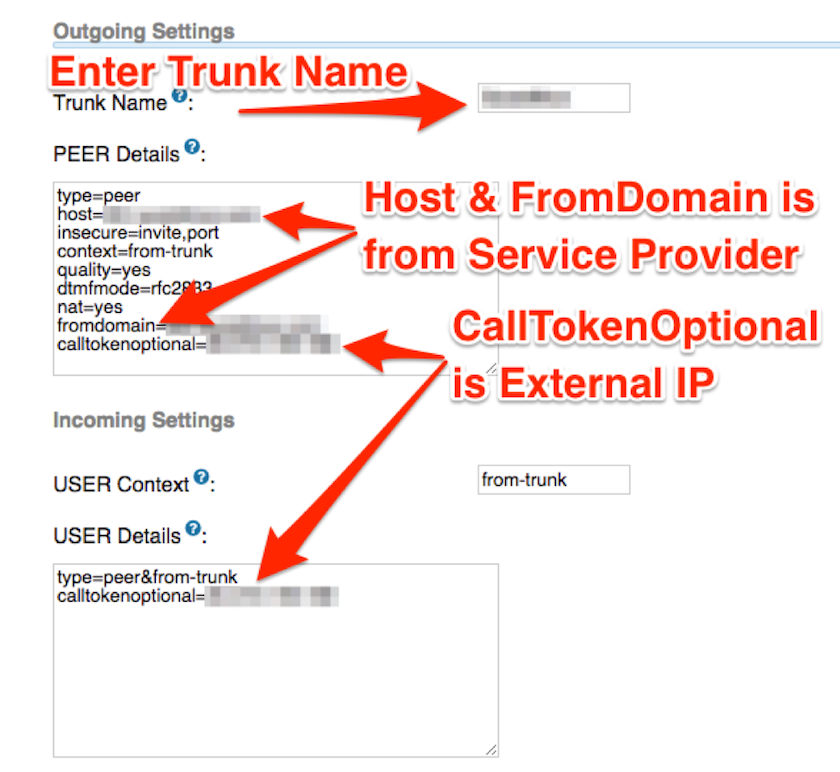
On the service provider’s website, you’ll need to create the SIP trunk and specify your external IP address to allow inbound connection on their side. Here’s an example of what mine looks like:

Setting up a SIP Extension
In order to dial into your Asterisk, you’ll first need to create some sort of unique identifier for the external DISA to hand off to the internal PBX. With Asterisk, extensions function the same as usernames.
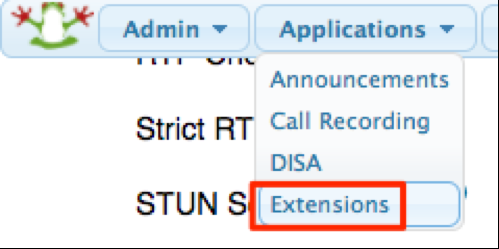
- Applications → Extensions → Add Extension
- Select the default, “Generic CHAN SIP Device”
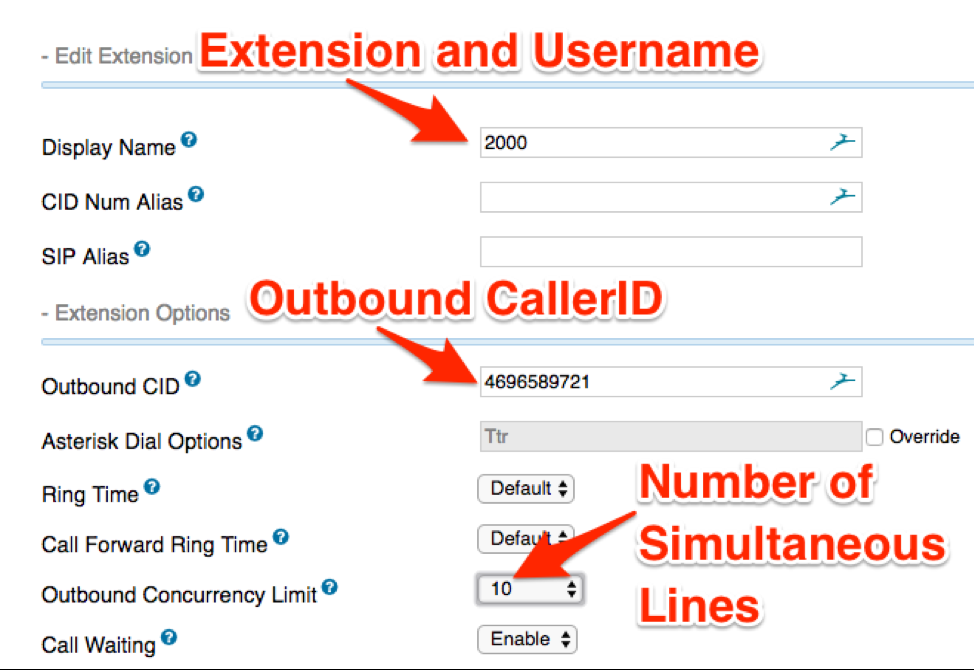
- Display name is the username and should be numeric (e.g., 4 digits)
- Outbound CID is the caller ID, customize however you’d like
- Note: This is how you’d manually set your caller ID. For the time being, it can be arbitrarily set to whatever you’d like as it’ll later be changed through a configuration file.
- Outbound Concurrency Limit is number of outbound calls that can be made concurrently with that extension. If multiple people will be making calls, you’ll want to make sure this number accommodates everyone.
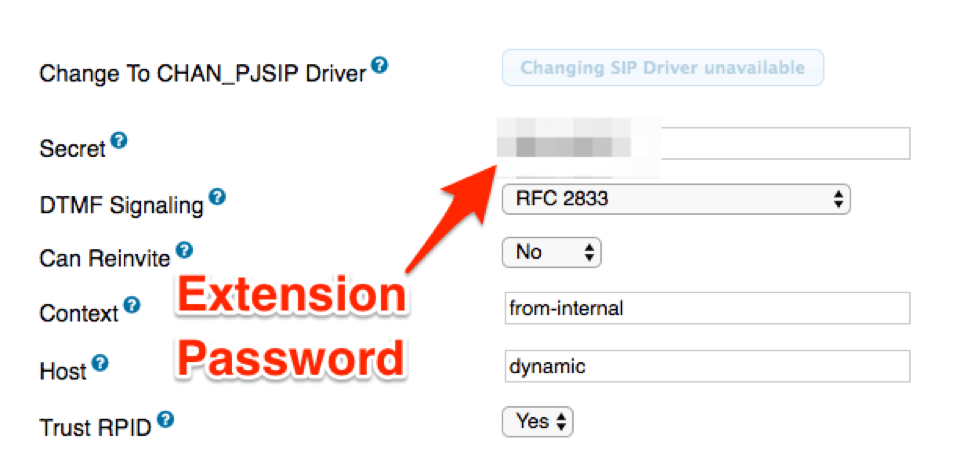
- Set a password for the extension, everything else can be kept default.
Interacting with Asterisk with Zoiper
Now, we’ve created a SIP trunk, configured it with our VoIP service provider, and set up an extension and password. Now we can use a softphone in order to dial out using our Asterisk.
You’ll first need to download Linphone softphone. It can be installed on Windows, Mac, and Linux:
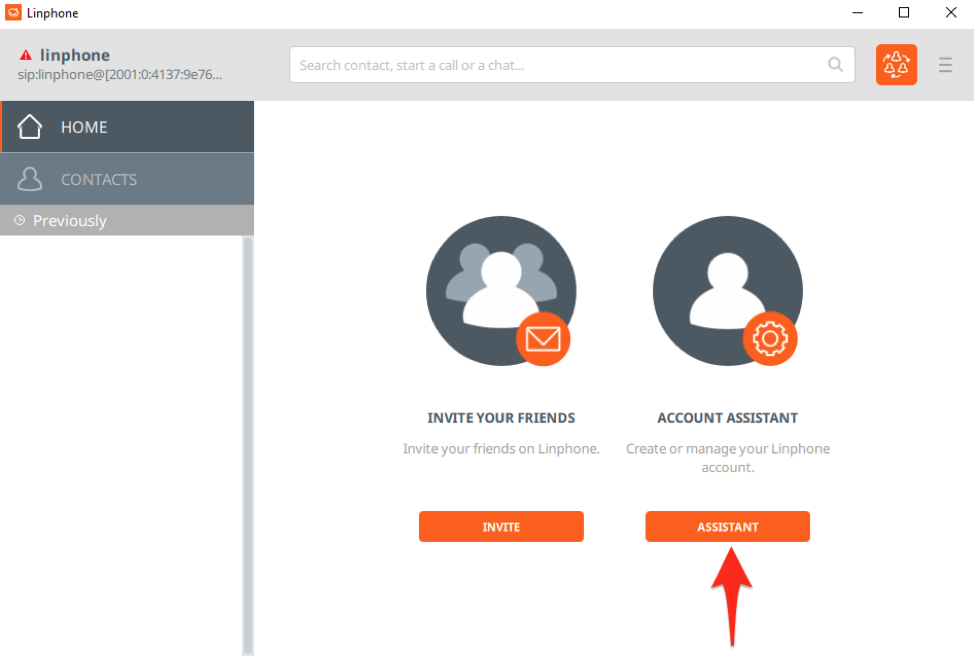
Once you have Linphone installed, open the program and click “Account Assistant”:
Next, we’ll click “Use a SIP Account”:
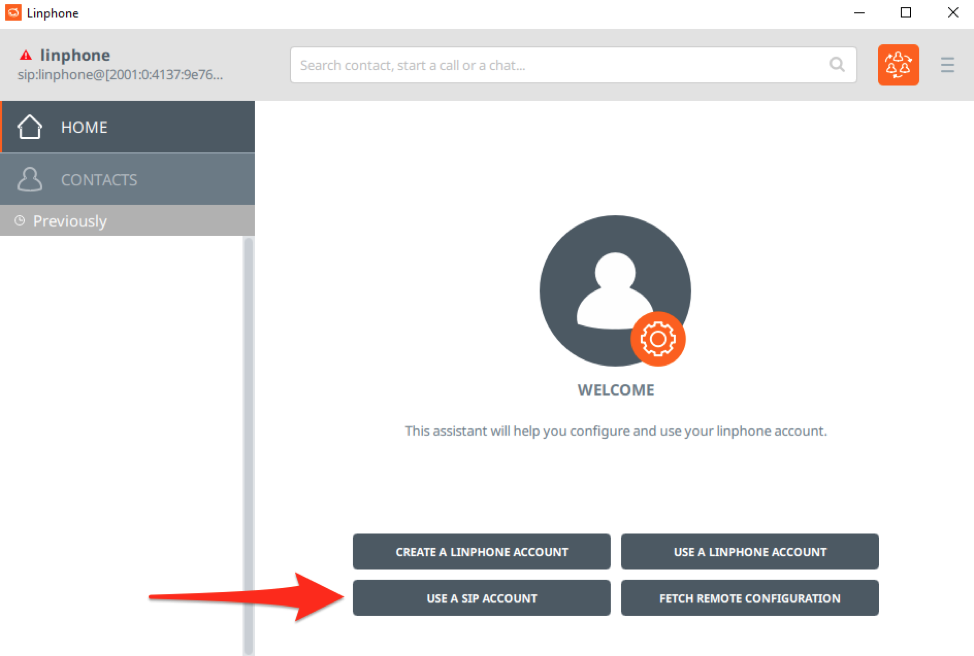
Using the extension we previously created, we will then login to Asterisk. If you’ve installed Asterisk on an externally facing VPS you’ll use the IP address. Otherwise, you’ll need to ensure you’ve setup port forwarding to your internal Asterisk server for SIP and RTP.
Enter in the username (extension), public IP of your Asterisk, and the password configured for the extension, leaving everything else as default:
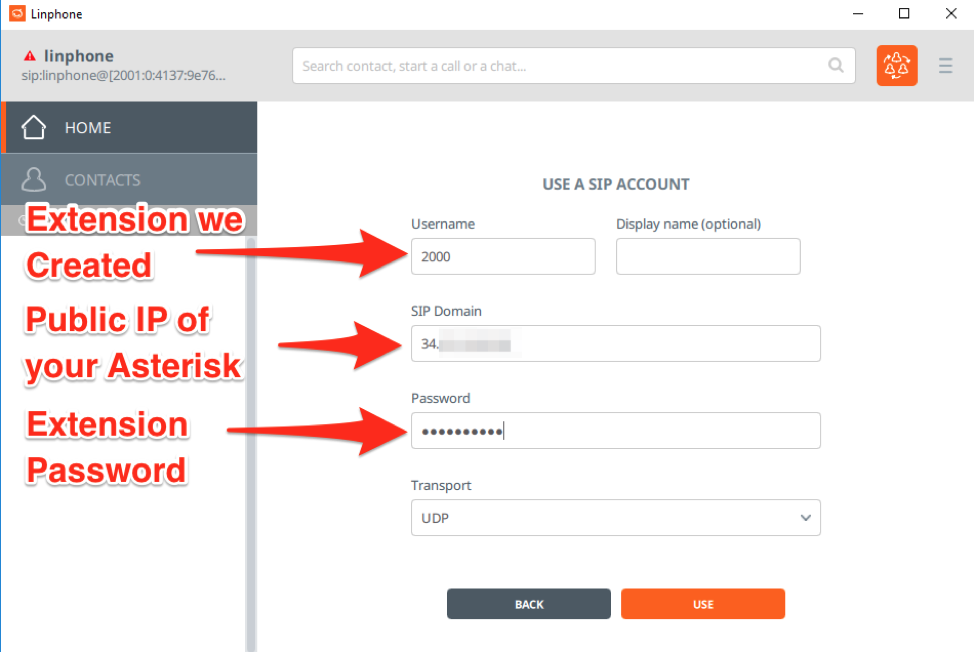
After clicking “Use”, you’ll be brought back to the Linphone home screen. Click the upper left corner to be presented with your Linphone accounts:
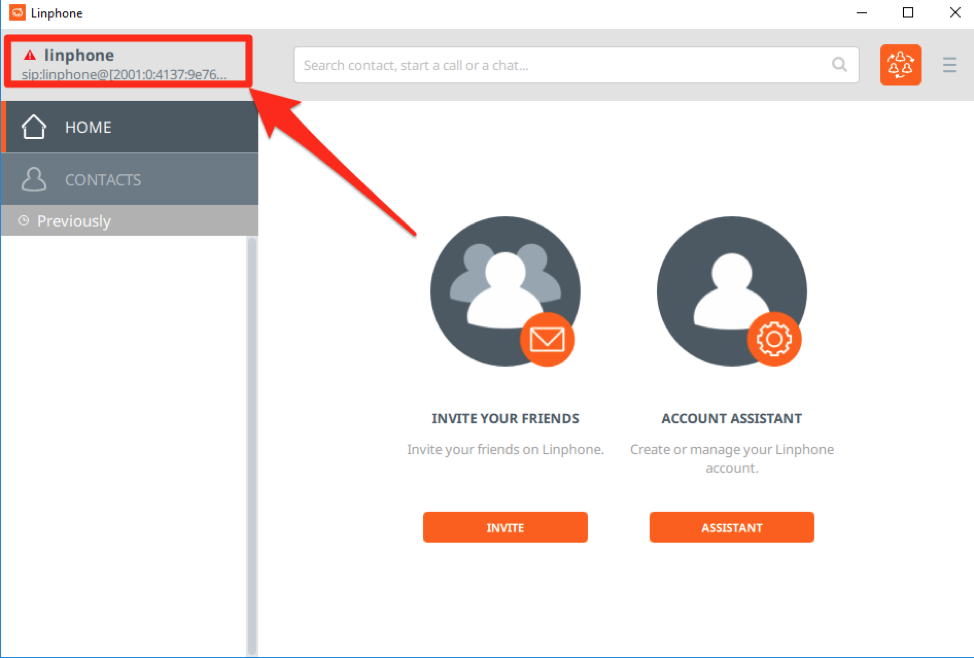
You will then select your newly created SIP account we registered with our Asterisk.
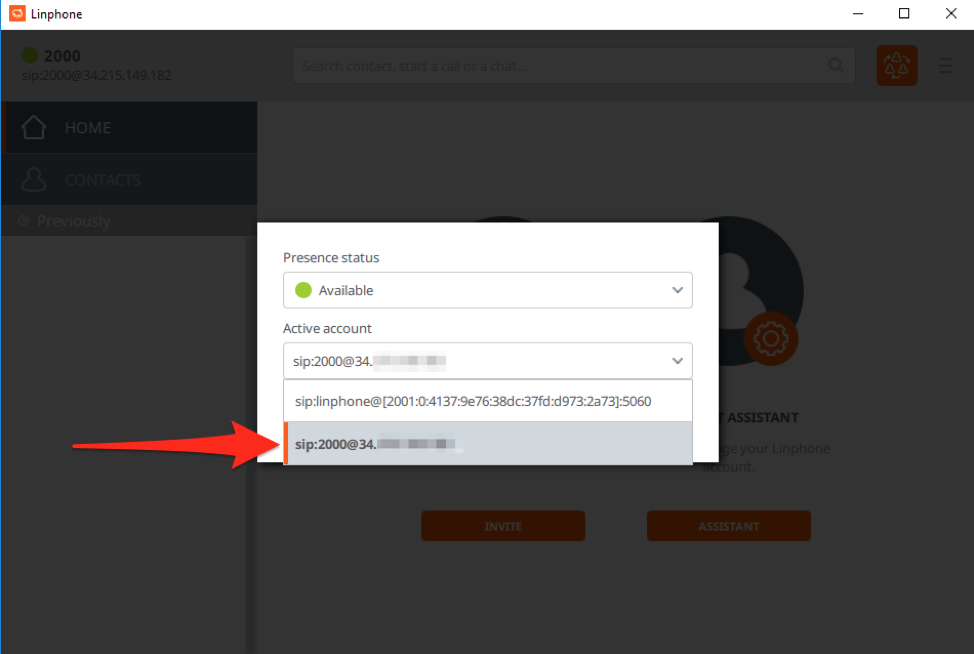
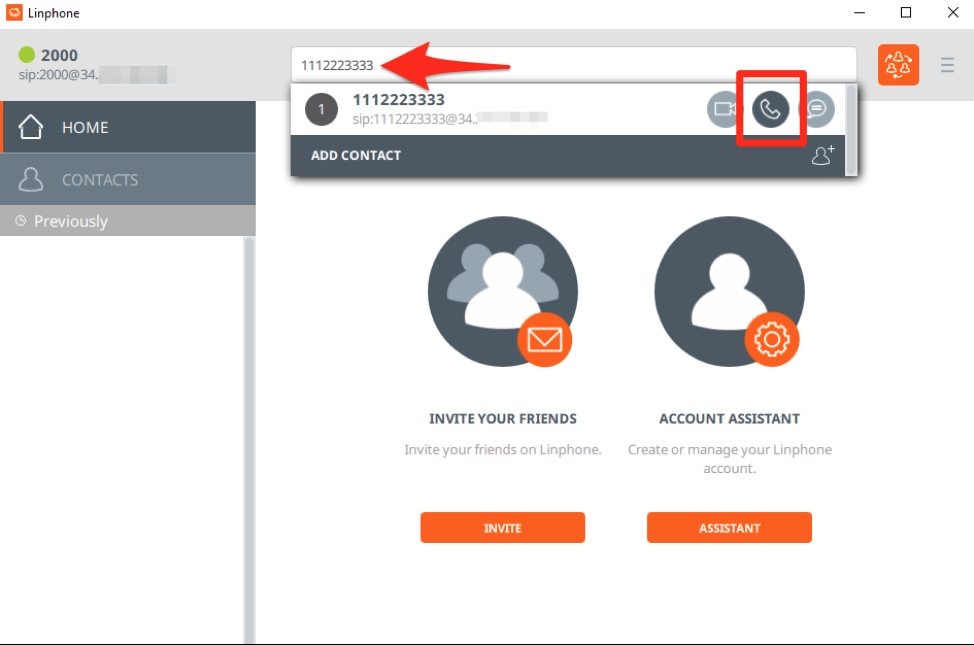
You can then make calls with the Linphone client using our Asterisk server by entering the destination telephone number in the text box at the top of the program.
That is it for Part 1 of the blog series. We have talked about how this project kicked off, how to setup Asterisk, how to configure Asterisk to spoof a source telephone number, and how to use a softphone client in order to interact with your Asterisk server. In the next post, we’ll delve in to creating a customized extension configuration and automation so Caller IDs can be spoofed on the fly.
NEVER MISS A BLOG
Get the latest stories, expertise, and news about security today.
Subscribe