“Where are the logs we are forwarding to InsightIDR, and what can we do with them?”
If you have been asking yourself this lately, this three-part blog series on finding answers with InsightIDR Log Search is for you. In this series, you’ll get our advice on how to be successful with powerful queries as quickly as possible.
In Part 1, we covered different ways to select log sets, the three search modes in InsightIDR, and how to adjust the way log entries appear in search results. Today, we’ll cover three useful Log Search concepts:
- Parsed logs
- Groupby function
- Log search operators
Let’s get started!
Start running powerful log queries in no time with a free trial of InsightIDR.
Get StartedParsed logs
Please log in to InsightIDR and follow along with me. After you are logged in, head into the Log Search section on the left-hand side of the page.
Let’s first examine a sample log. In this screenshot, I have selected the Asset Authentication log set and am looking at a single log found in search results.
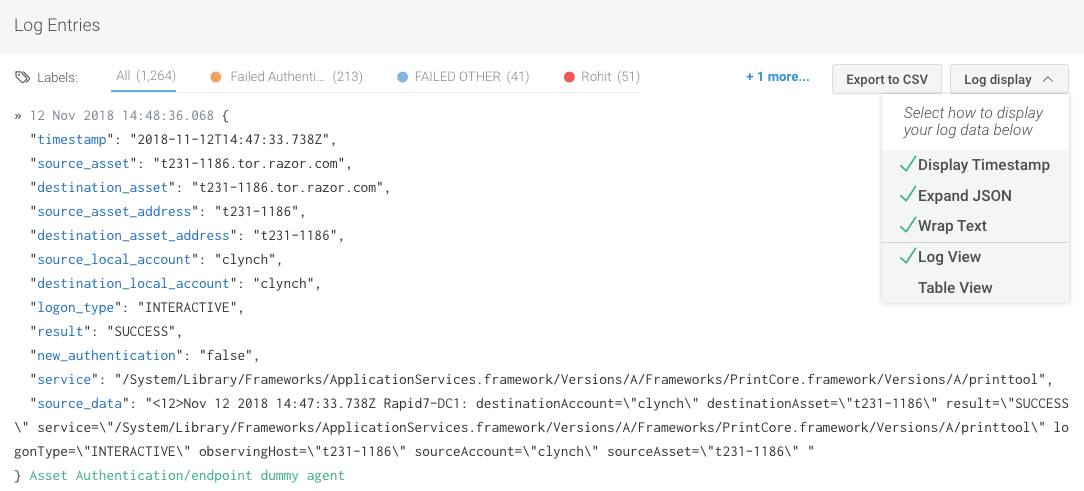
Our Log display is set to Log View with Expand JSON. This presents data with one field of parsed data per line, making it easier to identify interesting information. As you switch between log sets, take a moment to review parsed fields, as this will help you figure out what you want to dig into. Please note that the source_data entry is the raw log itself.
When the log is parsed, interesting fields of data are pulled out into what are called Key Value Pairs. For example, the account used for the authentication is pulled out into source_local_account and destination_local_account.
destination_local_account is one key and, in my log above, clynch is the value. You will want to examine your logs to determine which keys and values are of interest to you. For example, if you want to find out where a user is locking out his or her account, you probably want to look at the result and source_asset keys, which are called “fields” in InsightIDR.
My favorite analytic function is groupby, which will show you all the values in the field on which you are grouping. For example, let’s use groupby to drill into the Asset Authentication log set. Follow these steps:
- Select the Asset Authentication log set.
- Set the search mode to Advanced.
- Use Time Picker to set your desired time period to search.
- Enter your desired log search query into the “Query” box.
We can use groupby to sort by field logon_type:
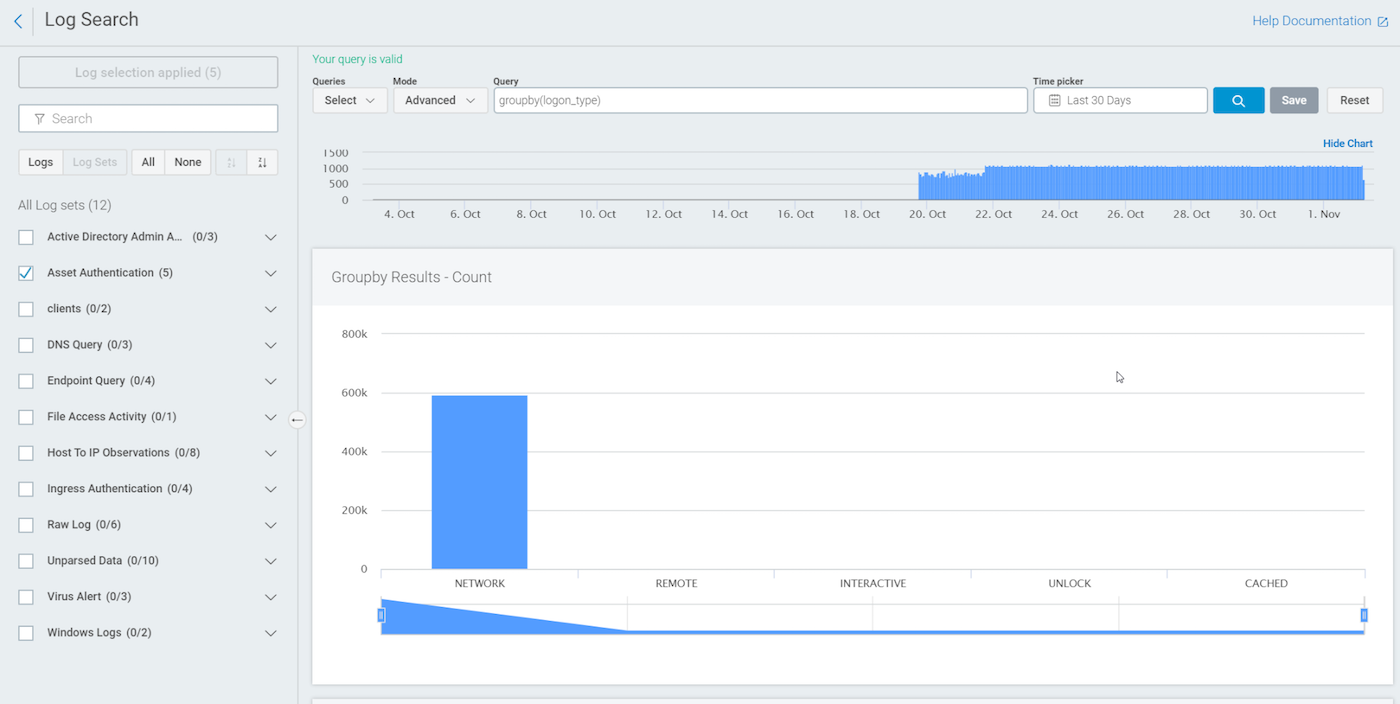
You can see that logon_type is parsing out the types of authentication that took place. Remember, results will only display based on what is in your logs. If you run the query and do not see any logon_type as INTERACTIVE, that means these logs are not in Log Search for you.
Now that you have run a groupby(logon_type), let’s look at another interesting field of data in the authentication logs: result.
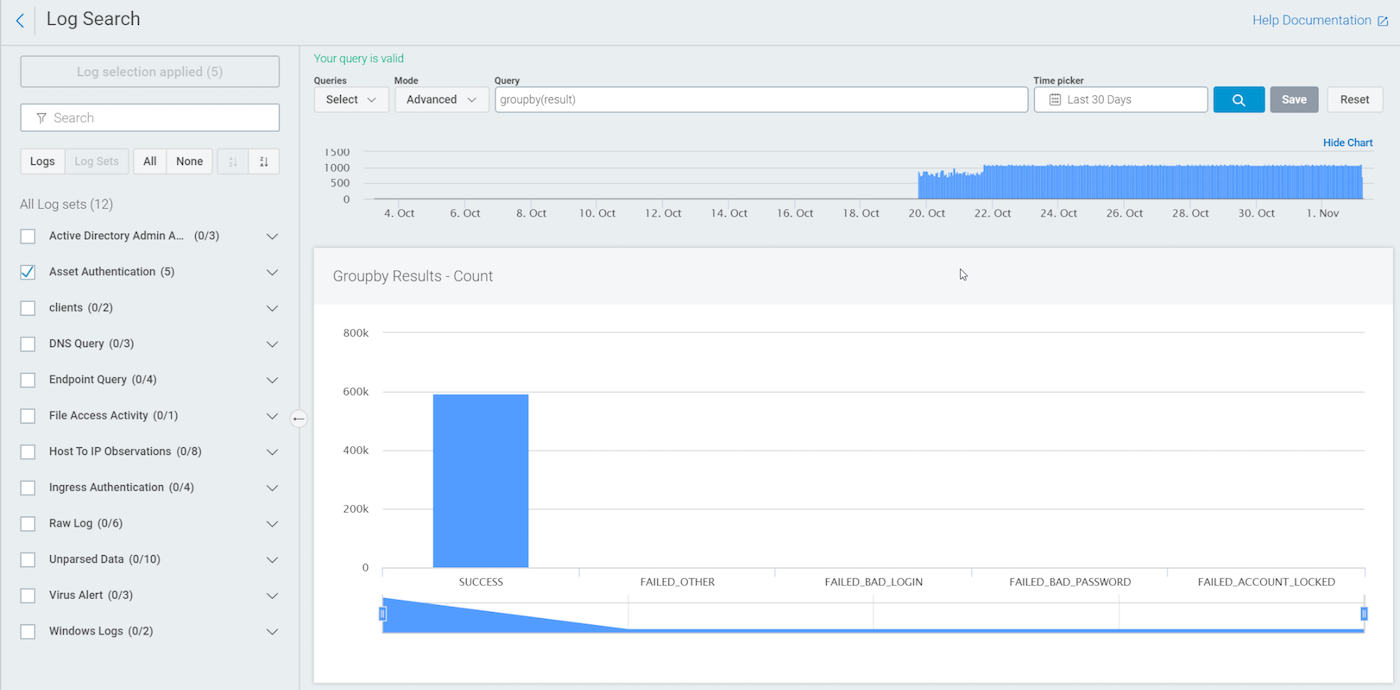
result shows whether or not the authentication attempt was successful.
Within your authentication logs, there are other interesting fields to groupby, such as:
- groupby(destination_user)
- groupby(source_asset)
You can groupby against any parsed fields in the log, so pick a field you are interested in and try your own query!
Log search operators: Logical and comparison
Logical log search operators
For this section, let’s start with logical log search operators. The two big hitters are AND and OR. In Log Search, they must always be typed in uppercase, but otherwise, they work just like you would expect.
To run a query in Advanced mode, the format is:
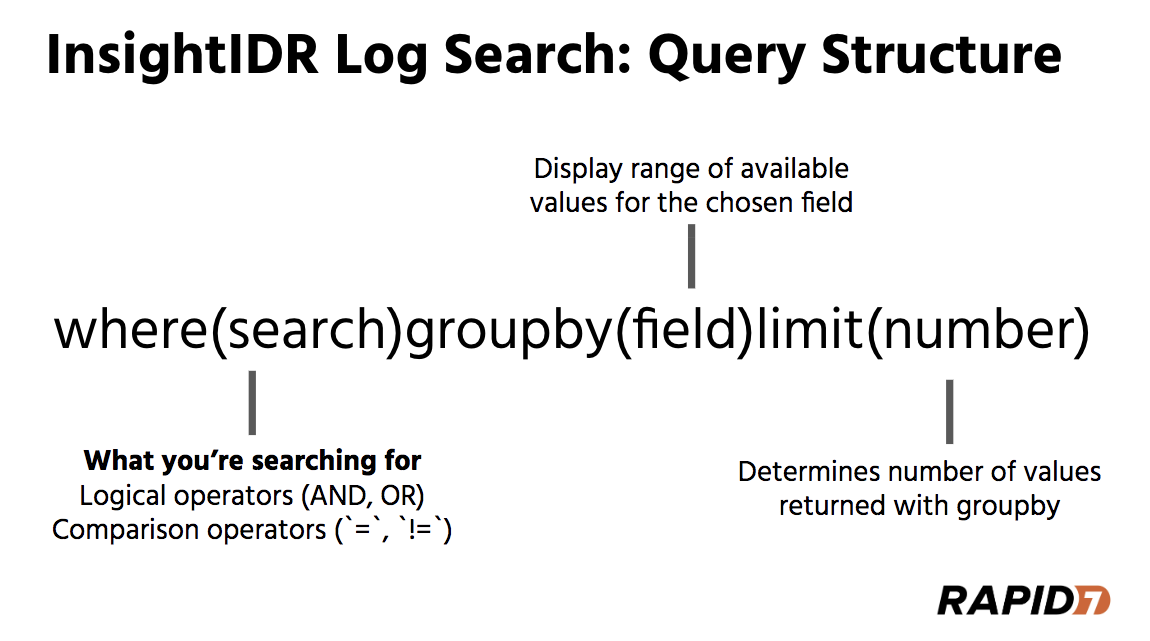
Start your search with where, followed by parenthesis. In the parenthesis, enter in what you need to find—note that you’ll always have just one where in the entire query. Within the parenthesis, use AND and OR to clarify what you need to find.
For example, let’s try a query to find all authentications of type REMOTE or INTERACTIVE. These values are particularly interesting, especially for field logon_type. An INTERACTIVE authentication is a logon at the keyboard or screen of the system, while REMOTE is an authentication where Remote Desktop or Remote Assistance was used.
We craft as follows:
where(logon_type=REMOTE OR logon_type=INTERACTIVE)
To narrow down to only logs where the authentication was successful:
where((logon_type=REMOTE OR logon_type=INTERACTIVE) AND result=SUCCESS)
To find out the systems my users are logging into, we can add groupby (in this case, destination_asset):
where((logon_type=REMOTE OR logon_type=INTERACTIVE) AND result=SUCCESS)groupby(destination_asset)
Comparison operators
The two most useful comparison operators are = and !=. We have already been using =, equal, which returns log events that match the value specified. Its opposite, not equal, is specified with !=. To find all the logs where authentications were not successful, search for “result not equal to success”:
where(result!=SUCCESS)groupby(result)
Putting it together
Now that we are familiar with advanced mode in Log Search, let’s try a real-world example. One of our users, Jack Frost, keeps locking his account out, so I want to find out on which asset this is happening. After that, I’d like to know who unlocked his account. With my log set selection checked for Asset Authentication, we can start finding answers with a groupby query:
groupby(result)
In the Groupby Results table, I can use View on Timeline or Search for This Key to go quickly to the FAILED_ACCOUNT_LOCKED events. The two options are very similar: View on Timeline includes an extra timeline graph that Search for This Key does not.

After you click on either, the query that you are running changes to match what you selected. After selecting Search for This Key, we now have this query in the box:
where(result="FAILED_ACCOUNT_LOCKED")
I want to add in the user, jfrost, that is having account lockout problems:
where(result="FAILED_ACCOUNT_LOCKED" AND jfrost)
Let’s also add in the groupby function to include the field we really want to know:
where(result="FAILED_ACCOUNT_LOCKED" AND jfrost)groupby(source_asset)
As expected, source_asset shows me which system the account is being locked out on.
Next, I need to find out who unlocked his account after it was locked. Let’s switch our selection to Active Directory Admin Activity and find the field I want to start with, action. Just like before, let’s groupby on this field:
groupby(action)
We should find ACCOUNT_UNLOCKED in the Groupby Results table, and can then Search for this Key:
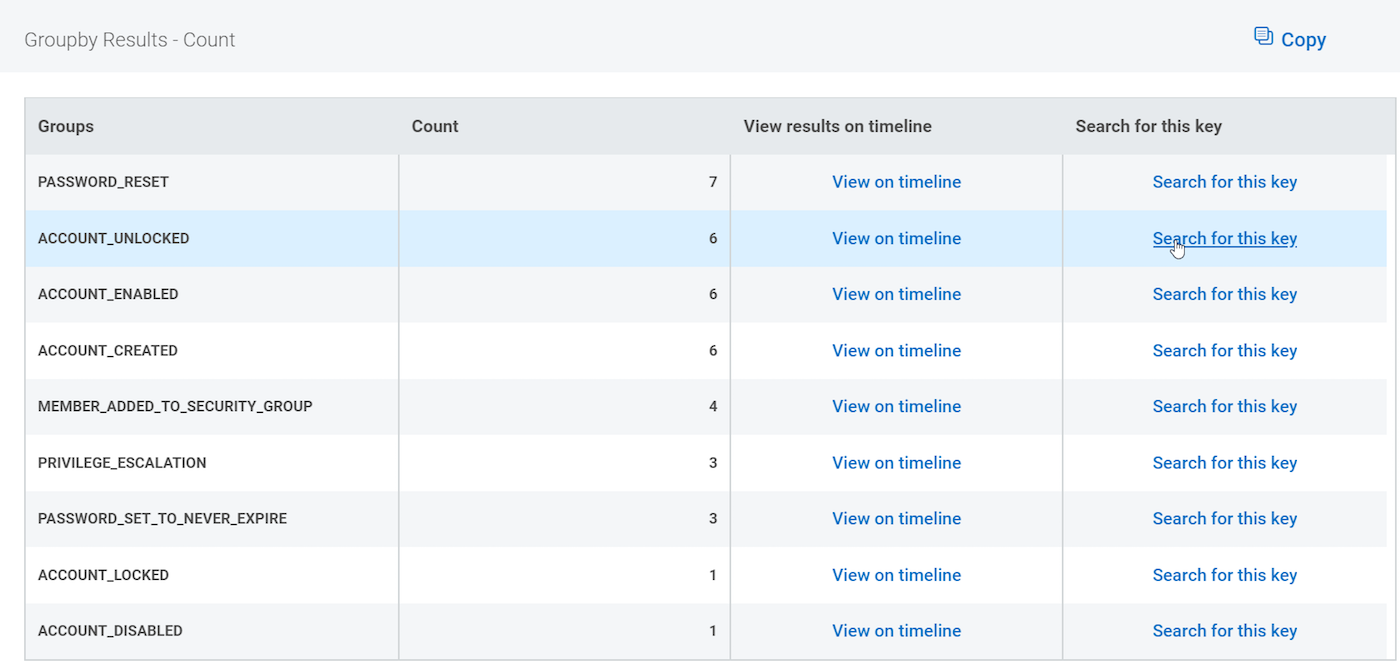
At this step, I can easily add jfrost, our locked-out user, to the query:
where(action="ACCOUNT_UNLOCKED" AND target_account="jfrost")
All of the queries demonstrated in this blog, along with many more, are available here.
Our key takeaway for today: If you’re not sure where to start, try a groupby with the field of interest to you. From there, you can use the Groupby Results table to drill into whatever you need to dig into.
For more, this two-minute video walks through using advanced mode to gather insights from your firewall data:
If you found this helpful in exploring your data or have any questions, please leave a comment below. Next week, we’ll conclude this search series with an introduction to regular expressions—Regex—to expand your search options even further. See you then!